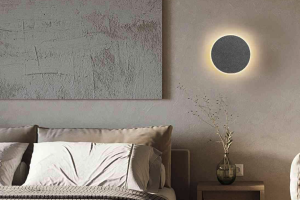
Upgrade Your Bathroom with a Frosted Glass Vanity Light
Frosted glass vanity lights are more than just a pretty face; they’re a really practical and stylish upgrade for any bathroom. They offer a winning combination of diffused light, privacy, and a modern aesthetic that can completely transform the feel of your space. Forget harsh, glaring illumination – frosted glass softens the glow, making your morning routine a little more pleasant and your evening wind-down a lot more relaxing.
Let’s break down why frosted glass isn’t just a trend, but a truly beneficial option for your vanity area. It brings a lot to the table beyond just looking good.
Soft, Diffused Illumination
One of the biggest advantages of frosted glass is how it handles light. Instead of a direct, harsh beam, the frosted surface scatters the light, creating a much softer and more even glow.
Less Glare, More Comfort
No one wants to squint at themselves in the mirror, especially first thing in the morning. Frosted glass significantly reduces glare, making your mirror a more comfortable place to be. It’s a gentler light for applying makeup, shaving, or just getting ready.
Flattering Light for All
Harsh lighting can create unflattering shadows and highlight imperfections. Frosted glass, on the other hand, diffuses the light in a way that’s much more forgiving. It casts a soft, even glow over your face, which is far more flattering and helps you see yourself in a more accurate and pleasing way.
Enhanced Privacy and Aesthetics
Beyond the practical lighting benefits, frosted glass also contributes to the overall look and feel of your bathroom.
A Modern and Chic Look
Frosted glass has a sleek, contemporary vibe that effortlessly elevates a bathroom’s design. It’s minimalist yet sophisticated, fitting in beautifully with a range of décor styles from ultra-modern to transitional.
Concealing Unsightly Bulbs
Let’s be honest, not all light bulbs are pretty to look at. Frosted glass shades effectively hide the bulb inside, giving your fixture a cleaner, more finished appearance. You get the light without the visual distraction of the bare bulb.
Durability and Maintenance
When you’re choosing something for a high-moisture environment like a bathroom, durability and easy upkeep are key. Frosted glass ticks both these boxes.
Long-Lasting Material
Glass, especially when tempered, is a robust material. It’s resistant to many common bathroom hazards, such as splashes and temperature fluctuations. This means your frosted glass fixture will stand the test of time.
Easy to Clean
Unlike some intricate fixtures, frosted glass is relatively simple to clean. A quick wipe with a damp cloth is usually all it takes to keep it looking fresh and free of water spots or grime. No special cleaners or complicated procedures needed.
Choosing the Right Frosted Glass Vanity Light
With so many options out there, picking the perfect frosted glass vanity light can feel a bit overwhelming. But by considering a few key factors, you can narrow down your choices and find a fixture that’s just right for your space.
Fixture Style and Finish
The overall design of the light fixture plays a huge role in your bathroom’s aesthetic. Think about what kind of look you’re going for.
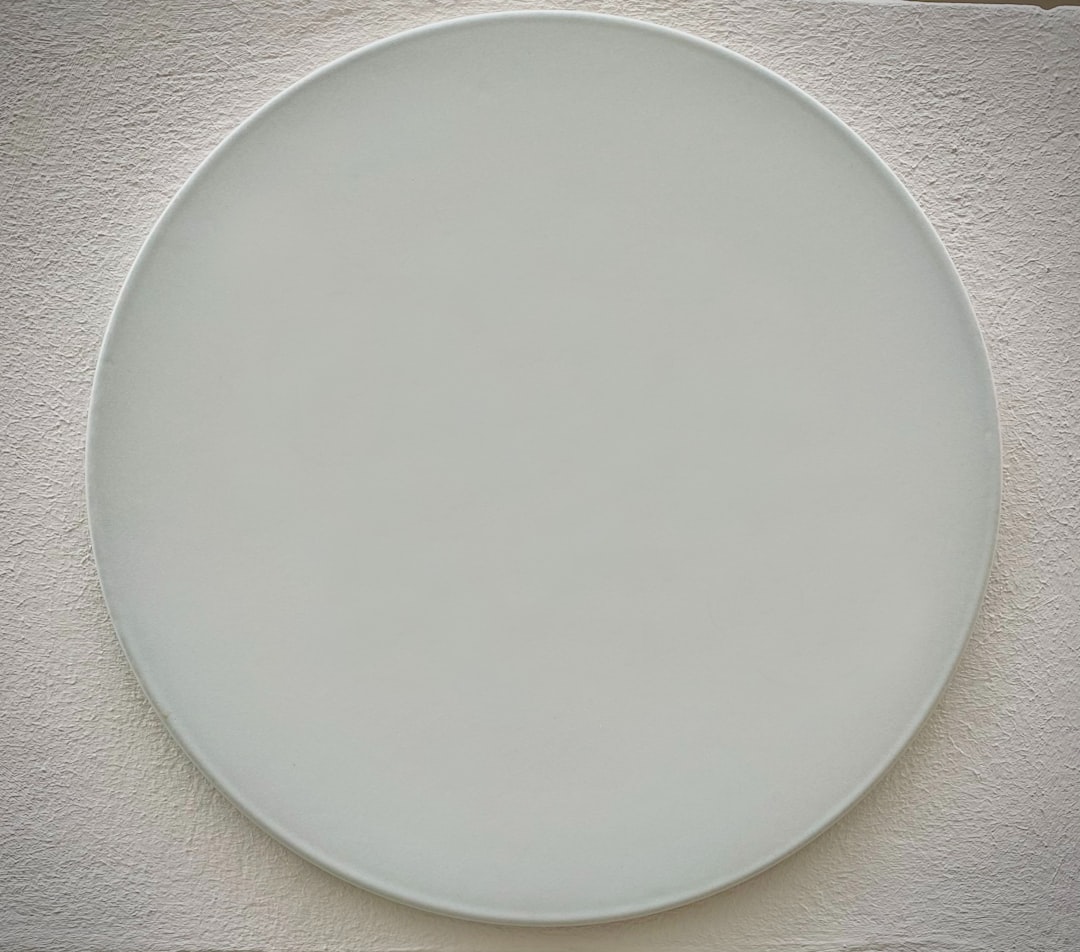
Modern and Minimalist
For a clean, uncluttered look, consider fixtures with straight lines, simple shapes, and finishes like brushed nickel, chrome, or matte black. These styles often feature rectangular or cylindrical frosted glass shades.
Transitional and Classic
If your bathroom leans towards a more classic or transitional style, look for fixtures with a bit more detail, perhaps in bronze, brass, or oil-rubbed bronze finishes. The frosted glass might be shaped more like an elegant cone or sphere.
Industrial or Farmhouse
Believe it or not, frosted glass can even work here! Pair it with aged bronze or distressed metal finishes and perhaps a more robust, cage-like design around the frosted glass for an industrial edge, or a more vintage-inspired shape for farmhouse.
Size and Placement
Getting the size and placement right is crucial for both aesthetics and functionality. An ill-sized light can throw off the whole room.
Over the Mirror
This is the most common placement. The light fixture should ideally be about 75% the width of your vanity mirror. This ensures even lighting across the mirror and prevents the fixture from looking either too small or too dominant. For a vanity with double sinks, two smaller fixtures or one longer one that spans most of the counter can work well.
Sconces on Either Side
This setup provides excellent, even cross-illumination, minimizing shadows on your face. When choosing sconces, ensure they are mounted at eye level (around 60-65 inches from the floor) and are spaced appropriately to frame the mirror without feeling cramped. The width of these sconces should also be mindful of the mirror’s width.
Multi-Light Bars
If you have a wider vanity, a multi-light bar with several frosted glass shades can be a great solution. These often come with 2, 3, or even 4 lights, providing ample illumination for larger spaces. They offer a cohesive look and are easy to install as a single unit.
Light Temperature and Brightness
The quality of light isn’t just about diffusion; it’s also about its warmth and intensity.
Kelvin (K) for Color Temperature
- Warm White (2700K-3000K): This is a softer, yellowish light that mimics incandescent bulbs. It creates a cozy and relaxing atmosphere, perfect for unwinding in the evening.
- Cool White (3500K-4000K): A more neutral, crisp white that’s good for tasks. It’s often preferred for makeup application as it provides a truer representation of colors.
- Daylight (5000K-6500K): This is a very bright, bluish-white light that closely mimics natural sunlight. While excellent for detailed tasks, it can feel a bit clinical for some bathrooms unless balanced with other warmer light sources.
For a bathroom, a good balance is often achieved with bulbs in the 3000K-4000K range. Consider dimmable bulbs so you can adjust the brightness for different times of day or different tasks.
Lumens (lm) for Brightness
Lumens measure the total amount of visible light from a lamp or light source. As a general guideline, for a typical bathroom, you’ll want to aim for around 800-1000 lumens per light fixture, or a total of 4000-8000 lumens for the entire bathroom, depending on its size and other light sources. Vanity lights should be bright enough to perform tasks like shaving or applying makeup comfortably.
Installation Tips for Your New Vanity Light
Even if you’re not doing the electrical work yourself, understanding the installation process can help you communicate with your electrician and know what to expect. If you’re comfortable with basic DIY electrical projects, make sure to always prioritize safety.
Safety First
Electricity and water are a dangerous combination, so always put safety first.
Turn Off Power
Before you touch any wiring, always turn off the power to the circuit at your home’s main breaker panel. Double-check with a non-contact voltage tester to ensure the power is indeed off. This step is non-negotiable.
Consult an Electrician
If you’re unsure about any step of the electrical installation, or if your existing wiring seems old or damaged, it’s always best to call a qualified electrician. They can ensure the installation is safe and up to code.
Preparing for Installation
A little prep can make the whole process smoother.
Gather Your Tools
You’ll typically need a screwdriver set (Phillips and flathead), wire strippers, electrical tape, possibly a drill, and a ladder or step stool. Having everything within reach beforehand saves a lot of time.
Read the Instructions
Every light fixture is slightly different. Read the manufacturer’s instructions thoroughly before you start. This will prevent surprises and ensure proper assembly.
The Basic Steps (Simplified)
While specific steps vary, here’s a general overview for replacement:
Removing the Old Fixture
Carefully unscrew the old fixture from the electrical box. Disconnect the wires (usually black to black, white to white, and green or bare copper for ground). Be mindful of any dust or debris that might fall.
Mounting the New Fixture
Attach the mounting bracket (usually included with the new fixture) to the electrical box. This bracket provides the secure foundation for your new light.
Wiring the New Fixture
Connect the new fixture’s wires to the corresponding wires from the wall. Twist the matching wires together and secure them with wire nuts, then wrap with electrical tape for extra security. Ground wires should always be connected.
Attaching the Fixture Body
Carefully tuck the wires back into the electrical box. Attach the main body of the new vanity light to the mounting bracket, securing it with screws or nuts as specified in the instructions.
Installing Bulbs and Frosted Glass Shades
Screw in the appropriate bulbs. Then, carefully attach the frosted glass shades. Take your time with this step, as glass can be fragile. Once everything is secure, turn the power back on and test your new light!
Maximizing the Impact of Your Frosted Glass Vanity Light
Once your new light is installed, there are a few extra touches that can really make it shine (pun intended!) and enhance your bathroom’s overall design.
Pair with a Dimmer Switch
This is perhaps the single best upgrade you can make to your lighting setup.
Setting the Mood
A dimmer switch allows you to adjust the light output from bright task lighting to a soft, ambient glow. This is fantastic for relaxing baths or for a gentler wake-up call in the mornings, making your bathroom a truly versatile space.
Energy Savings
Dimming your lights also uses less electricity, extending the life of your bulbs and saving you a little money on your energy bill.
Complementary Décor Elements
Think about how other elements in your bathroom can work with your new light.
Mirror Choice
A frameless mirror or one with a simple, sleek frame will complement the modern aesthetic of frosted glass. If you’re going for a more traditional look, a slightly more ornate mirror frame can still work if the fixture has some classic detailing.
Vanity Materials
If your vanity is made of natural wood, the frosted glass can provide a nice contrast. For a more contemporary feel, pair it with polished chrome or marble countertops. The diffusion of frosted glass also softens any harsh reflections from glossy surfaces.
Wall Color
Light-colored walls (whites, grays, soft blues) will help reflect the soft light from your frosted fixture, making the bathroom feel brighter and more open. Darker walls create a more dramatic, intimate atmosphere, where the diffused light can add a touch of sophisticated moodiness.
Regular Cleaning and Maintenance
To keep your frosted glass looking its best, a little routine care goes a long way.
Gentle Cleaning
Frosted glass can sometimes show fingerprints or water spots more readily than clear glass. Use a soft, lint-free cloth and a mild glass cleaner (or a solution of water and vinegar) to wipe down the shades. Avoid abrasive cleaners or scrubbing pads, as these can scratch the frosted surface.
Bulb Replacement
When a bulb burns out, replace it with one of the same type, brightness (lumens), and color temperature (Kelvin) to maintain consistent lighting. Make sure the light fixture is off and the bulbs have cooled completely before handling them.
Troubleshooting Common Issues
Even with the best planning, sometimes things don’t go perfectly. Here are a few common issues and quick fixes.
Light Not Turning On
This is the most frustrating issue, but often has a simple solution.
Check the Breaker
The first and most common culprit is a tripped circuit breaker. Head to your main electrical panel and check if the breaker for the bathroom is in the “off” position. If it is, flip it back to “on.”
Check the Bulb
Sometimes it’s as simple as a loose or burnt-out bulb. Unscrew the bulb, check for any visible damage to the filament, and securely screw it back in or replace it with a new one.
Loose Wiring
If the breaker and bulb are fine, and you installed it yourself, carefully recheck the wire connections within the electrical box. A loose connection at a wire nut can prevent power from reaching the fixture. Remember to turn off power at the breaker before inspecting wiring.
Flickering Light
Flickering can be annoying and sometimes indicates a problem.
Loose Bulb or Wrong Bulb Type
Again, check the bulb. Ensure it’s screwed in tightly. Also, make sure you’re using bulbs compatible with your fixture, especially if you have a dimmer switch. Not all LED bulbs are dimmable.
Faulty Dimmer Switch
If you have a dimmer switch, it might be the cause. Older or incompatible dimmer switches can sometimes cause LED bulbs to flicker. Upgrading to a modern, LED-compatible dimmer often resolves this.
Wiring Issues
Less commonly, flickering can be a sign of loose or old wiring. If other solutions don’t work, and especially if you notice flickering with other fixtures on the same circuit, consult an electrician.
Uneven Lighting
This usually comes down to bulb choice or placement.
Bulb Consistency
Ensure all bulbs in a multi-light fixture are the same type, wattage/lumens, and Kelvin temperature. Mixing different bulbs will definitely create an uneven look.
Fixture Placement
If you feel your face is still getting shadows, reconsider moving the fixture slightly or adding side sconces for better cross-illumination. Sometimes, simply rotating the fixture or adjusting the angle of the shades (if possible) can help.
In conclusion, upgrading your bathroom with a frosted glass vanity light is a relatively straightforward way to achieve a significant impact. It’s a practical choice for comfort, a stylish choice for aesthetics, and a safe bet for durability. By carefully considering your options and following these tips, you can create a beautifully lit bathroom that you’ll love for years to come.